Maximizing Linen Closet Storage

1. Store extra pillows on the very top shelf. This will allows you to use the ceiling height to your advantage, and if a pillow topples down on you, no big deal.

IMG_5321

2. Store extra blankets, quilts and comforters on the bottom.

3.  Fold your bath towels in thirds instead of halves (follow the same steps, minus the last fold, for hand towels)

IMG_5329

IMG_5330

IMG_5331

IMG_5332

IMG_5334

4. Fold hooded towels into neat little packages like this

IMG_5340

IMG_5341

IMG_5342

IMG_5343

IMG_5344

5. Learn how to fold a fitted sheet. There are a ton of great video tutorials on the web so I will refrain from reinventing the wheel. BHG has a great one.

6. Keep your wash cloths in a small basket. You can place this basket in front other linens which allows you to take full advantage of shelf depth without sacrificing accessibility to the item(s) behind.

IMG_5322

Trust me, the folding makes a difference :).

Confession: I learned how to properly fold a towel in the last year. To see what our linen closet looked like before, you can sneak a peak here.


5 Tips for Maximizing Bathroom Storage

I think most of us can agree that how a day begins is a large predictor of how the rest of the day will go. Think about it. When you have a bad day, can’t you usually trace its origins back to the first couple of hours?

With that in mind, this post is going to focus on the place most days begin (the bathroom), and how I maximize our storage.

1. I keep my make-up and daily products stored “ready for travel.” This idea was “birthed” when I was packing my hospital bag before my youngest was born. I bought a travel organizer and I liked it so much, I just never unpacked. My organizer  simply hangs from an over the door hook. It is easy see and access my products, and when we do travel (not often), I just have to grab my organizer and a few things from the shower. (Admittedly, this won’t work for someone who has a lot of make-up.)

IMG_0464

2. Drawer organizers are used for toothbrushes, tooth paste and floss storage.

IMG_0522

3. Drawer organizers are also used for combs and brushes and  share a drawer with the Q-tips. (I know a lot of people put their Q-tips and cotton swabs in pretty decanters,  but if the packaging fits in the drawer and is easy to access, I don’t change it.)

Confession: hoarding brushes and combs used to be a serious problem for me. A few years back I threw away probably 15 combs and brushes that I didn’t use. Why I was hanging onto those unused combs and brushes like some poor soul from an episode of “hoarders” I still don’t know. I think I, like many, hate the idea of throwing something away that I spent money on, but there is a valuable lesson to be learned when purging drawers, cabinets and closets. DON’T BUY S%#* YOU DON’T NEED! No one needs 6 brushes, 4 picks, and 5 combs. Find one of each that you really like and purge the rest.

IMG_0523

2. Feminine products are stored in a small tote. For 7 days, this tote can be kept near the toilet; It can be tucked back under the counter for the other 20-some odd days.

3. First aid and seasonal products (sunscreen and bug spray) are also kept in clear, labeled, portable totes.

4. I am a huge fan of stackable, labeled drawer organizers for the purpose of categorizing like items and maximizing vertical space.

IMG_0467

5. My hair tools (hair dryer, curling iron, flat iron, etc.) are kept in a basket under my sink. I can pull it out when needed and tuck it back under when not.

IMG_0470

It goes without saying, but must be said – A clutter free, organized bathroom is SO MUCH EASIER to clean!


Maximizing Pantry Storage

I have always wanted a walk-in pantry, and it was on my must-have list when we were house hunting… I didn’t get one. Boo, hiss. But just because it’s not a walk-in doesn’t mean it can’t be super functional and organized.

Before

IMG_3352

Not bad. Fairly organized, but still in need of some “Type A” love.

It was in need of a fresh coat of paint, and the poorly functioning door, when opened, would close off the doorway to the dining room.

So, we emptied the pantry, removed the (poorly functioning) door, and gave it a fresh coat of paint.

I then tapped into my pantry’s full potential by…

1. grouping like items in durable plastic baskets (this allows me to take full advantage of the shelf depth without sacrificing accessibility

2. using drawer systems to organize our medicines and k-cups (this allows me to take full advantage of vertical space)

3. transferring our cereal to clear stackable containers

4. Using clear bins to store our pasta (I labeled them with the cooking times)

5. Using a tiered organizer for our canned goods

6. Utilizing a crate with a chalkboard front to store our potatoes and onions

7. Labeling!!!

After

IMG_5279

A clean, well organized pantry simplifies meal planning and eliminates over-buying. Win. Win.


In the Kitchen of a Type A Housewife

While I am not, by any stretch of the imagination, a designer, I decided I am going to post before and after pictures of our new house as the rooms evolve and projects get completed.

Our first project was the kitchen. The changes were few, but the impact was huge!

What we did:
1) painted the cupboards black
2) added cabinet hardware
3) changed the wall color
4) painted the trim
5) changed the light fixture over table
6) window coverings (not pictured)
7) new appliances

Before

Image

After

Image

I don’t decorate my kitchen per se, but I do like it to look like some thought was put into it. For that reason, I make it a rule that anything “decorating” our kitchen has to be functional. Since pictures are more fun and where inspiration is usually drawn from anyway, I snapped a few pics of my kitchen and how I add “personality” to it.

Image
A stoneware crock holds utensils, and my copper tea kettle adds some visual interest.

Image

A basket holding cookbooks adds texture (and easy organization), and my dutch oven adds a pop of color.

Pretty simple, but I find these little elements charming as well as functional, and it doesn’t add unnecessary clutter.

Starting a Toy Rotation

I am simplifying our play spaces. They weren’t functioning the way I wanted them to so I started voraciously reading about Montessori principles.

I was immediately captivated by the clean, uncluttered spaces that promoted early literacy, math, self-help, fine motor and rest.

After extensive reading, I discovered that I didn’t “buy into” to the Montessori philosophy in its entirety, but that there were definitely aspects that I wanted reflected in our play space.

My Must-Haves
1. Good Design
The space should be uncluttered and everything should be easily accessible to little ones.

2. Promote exploring and learning

Before

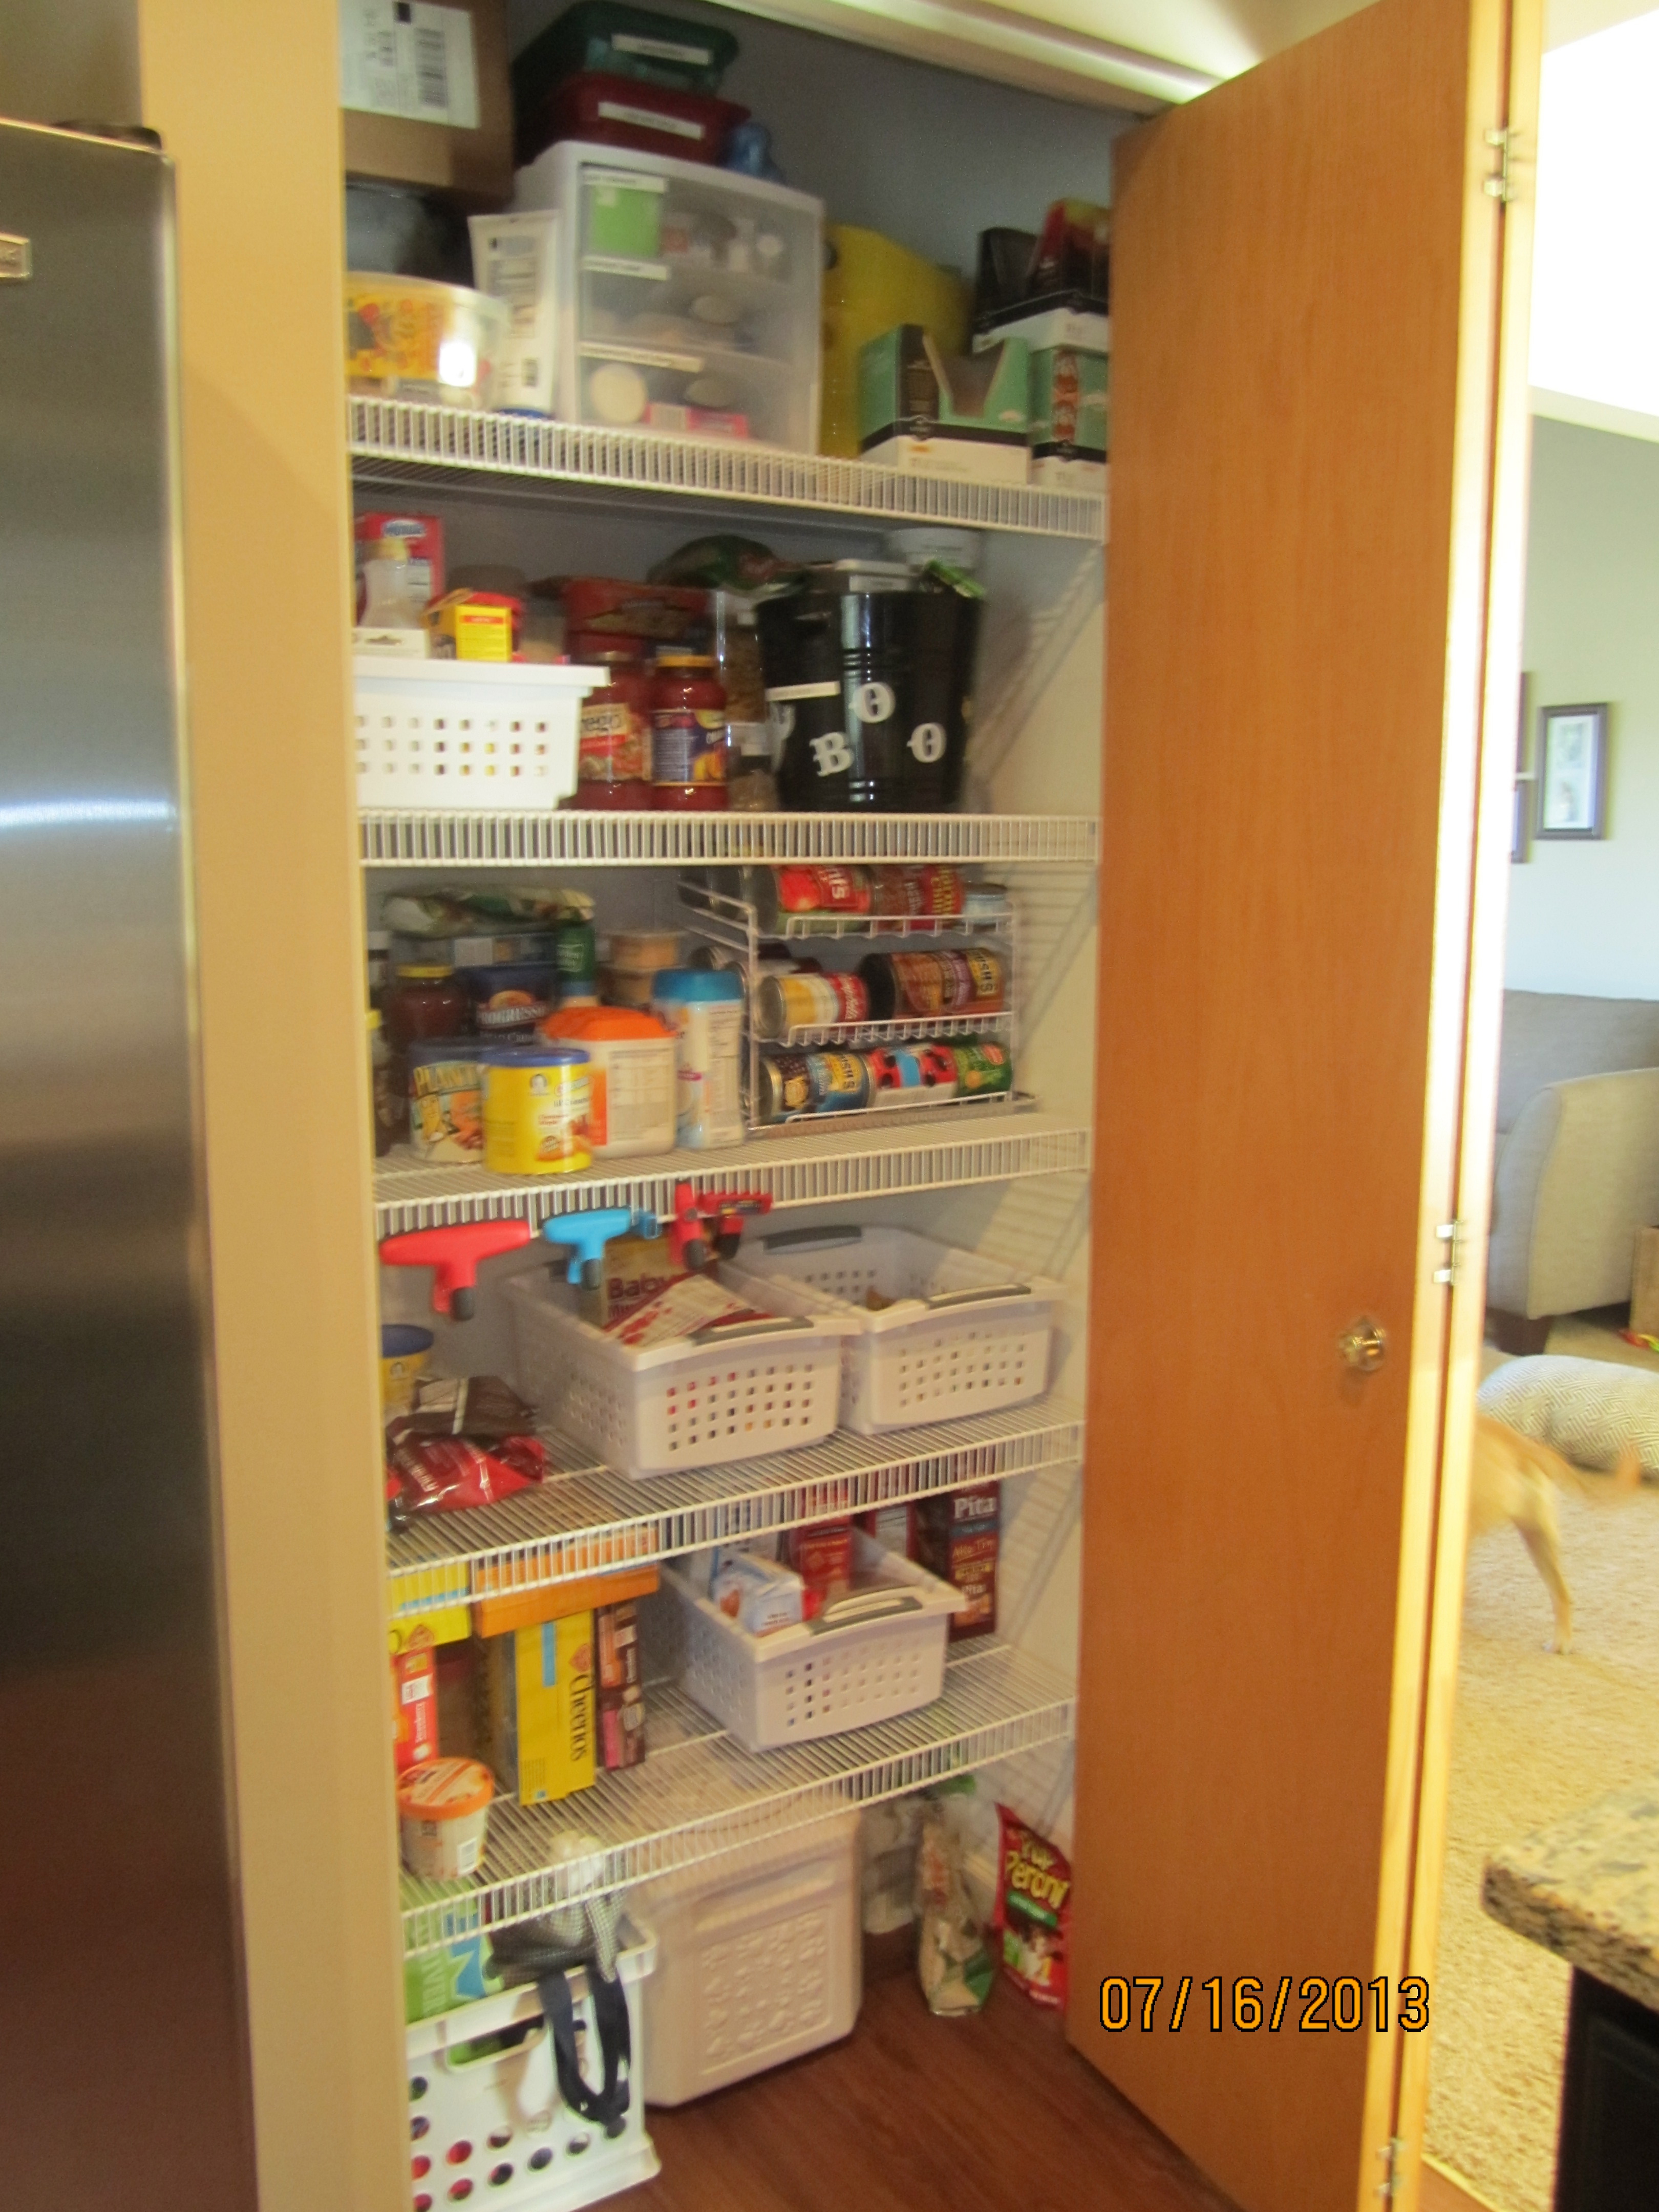
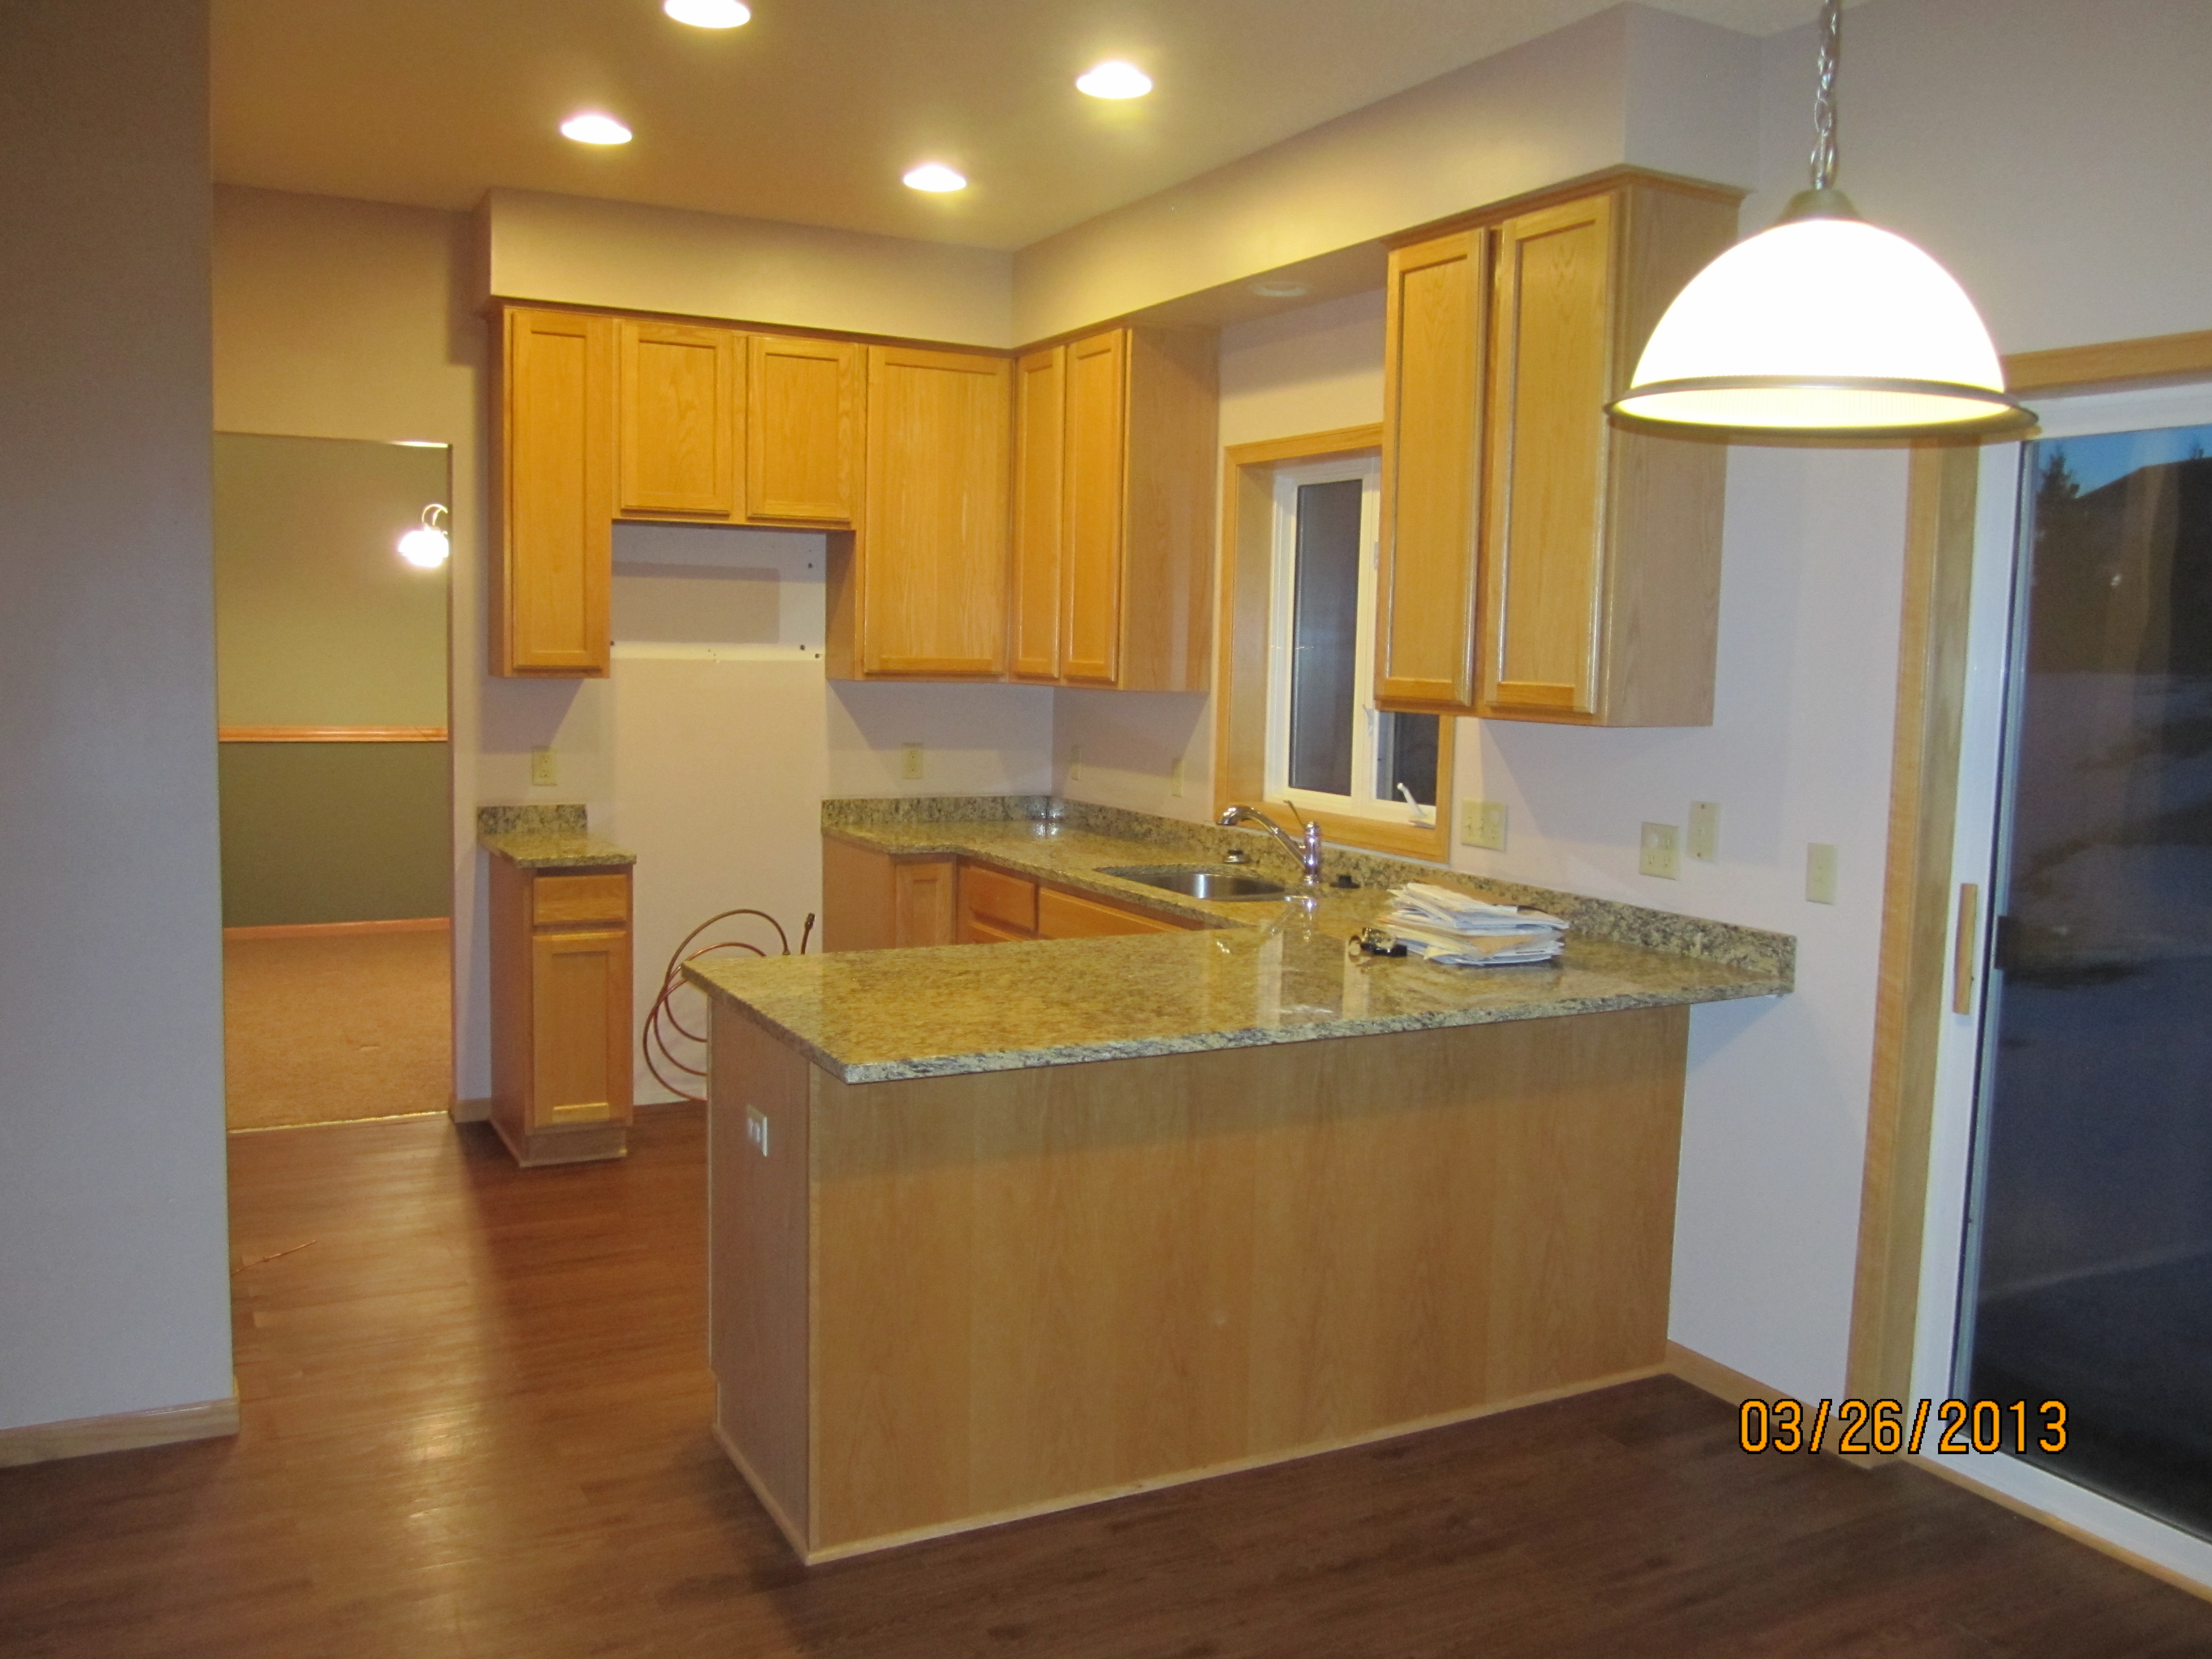
In our previous play space, every toy was accounted for – talk about sensory overload!

Image

Image

Confession: Our previous space made me itch a little. That probably explains why we spent very little time there…

Kids are kind of like puppies… give them too few toys, they get bored (and destructive); Give them too many toys, they get bored (and destructive). I decided to pare down and start a toy rotation.

All that is really needed for a good toy rotation is baskets…lots and lots of baskets, bins, and buckets (and a place to store the toys out of rotation).

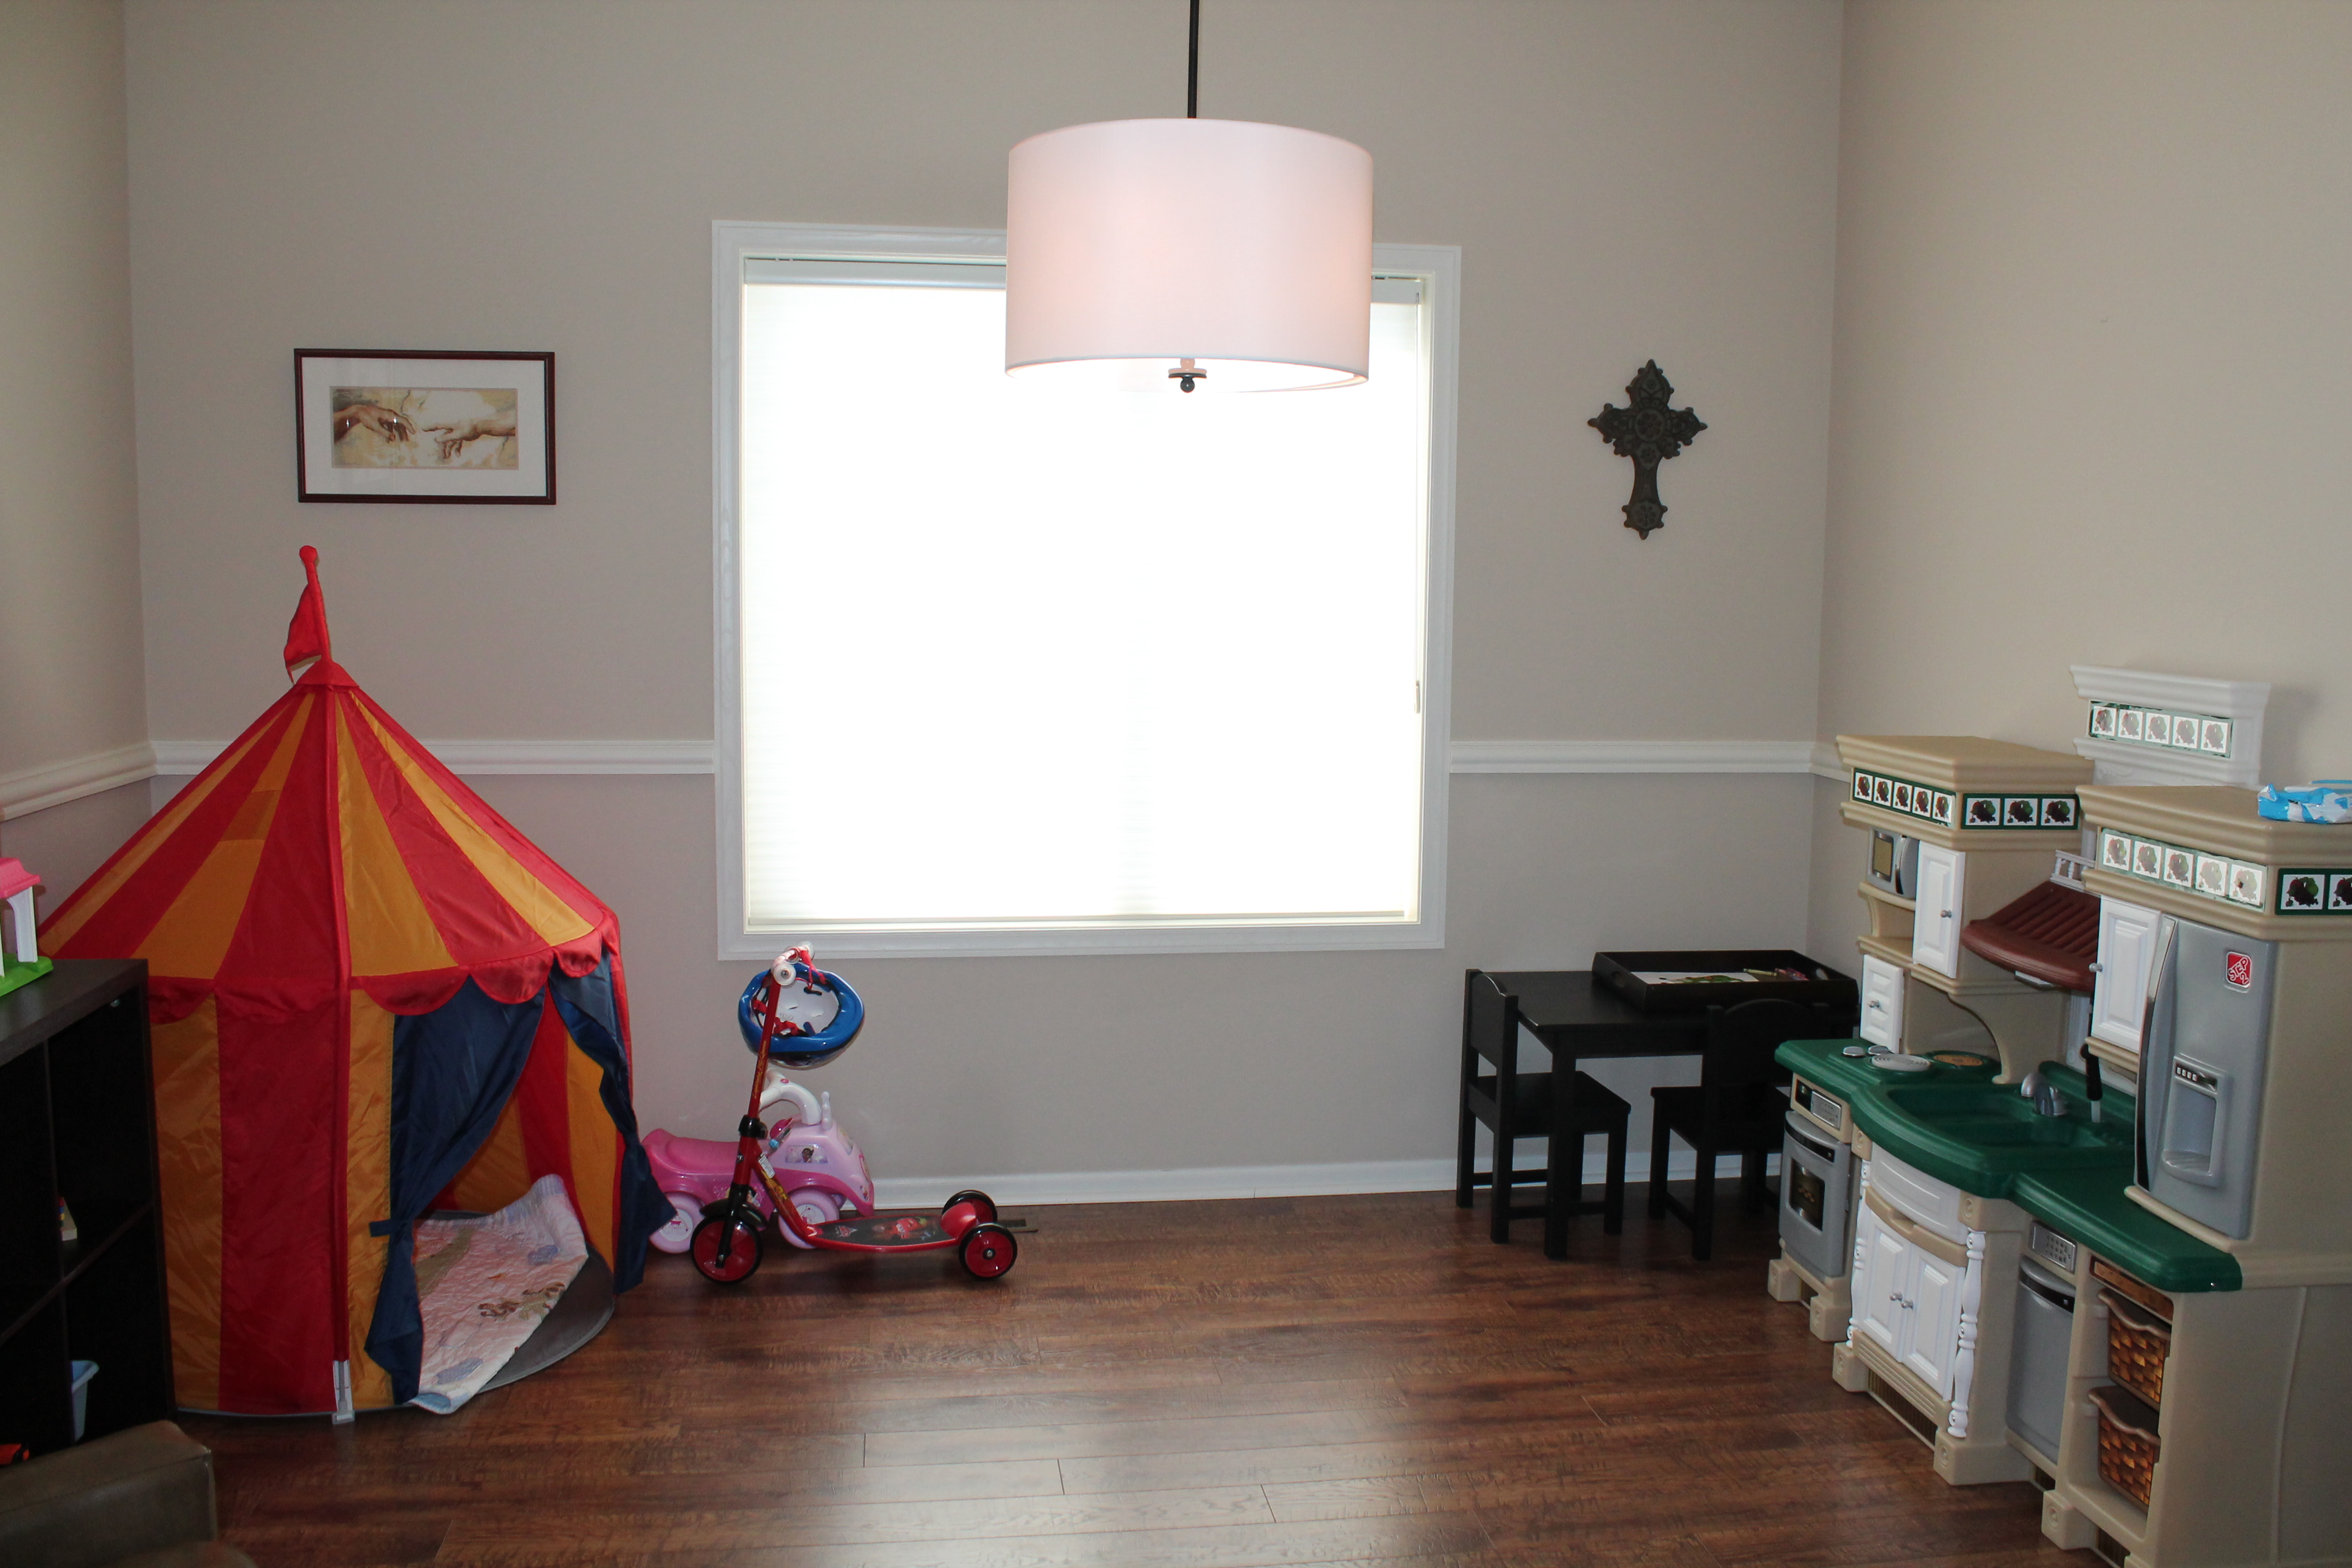
Here is a little tour of our play space AFTER starting a toy rotation…

Image

We included a comfy chair with low arms so that the three of us can sit together to read a book or two (or five).

The six cubby unit keeps the area clutter free, organized and the activities are easily accessible. (It will also be easy to rotate new toys in when the kids get bored with these.)

The tent is an all time favorite for my kids. Sometimes they play peek-a-boo from behind the curtain door, and other times they like to sneak away for some quiet time. My favorite is when they go in together and I can’t see them, but can hear them giggling. My least favorite is when they go in together and someone ends up in tears.

Image

The child-sized table is a perfect spot to do something creative like draw or play with play-dough.

The kitchen is a perfect place to “play grown-up,” and a basket of instruments gives them an opportunity to give me a headache make a little music.

Image

As a recap, the must-haves for our Montessori-ish playroom are…

1. Good Design
The space should be uncluttered and easily accessible to little ones.

2. Promote exploring and learning

I hope you enjoyed the tour of our play space ☺

Sydney likes it!

Image